| Channel | Publish Date | Thumbnail & View Count | Download Video |
|---|---|---|---|
 | Publish Date not found |  0 Views |
It is explained in clear, non-technical language so that any layman can understand the ideas and techniques.
Testing is also explained towards the end. Testing is important so that you don't get frustrated when connecting computers. You need to know that your cable has been tested and that it is not the cause of problems.
Here's a summary of what happens in this video:
1. Explanation of the cable routes from the central location to the data points.
2. the installation of the wall sockets
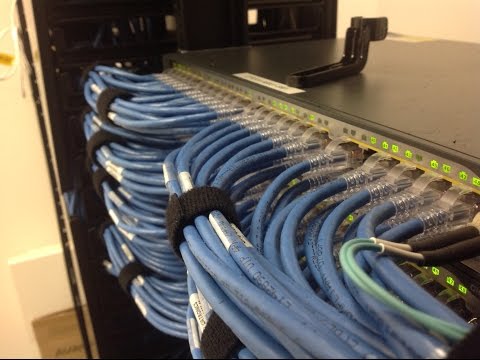
3. the termination of the cables to the patch panel
4. Cable management and mounting of patch panel
5. Testing cables for correct numbering and validation of connectivity.
Supplies:
—————————————-
Category 5e or 6 UTP (Unshielded Twisted Pari) cable
RJ-45 modular inserts (also called data connectors)
Wall plates with RJ-45 hole
Patch panel with 12, 14 or 48 ports
Network cabinet or 19/" wall bracket (for panel)
Caddy clip drywall mud rings.
———————————————————————
CONTRIBUTE to support Network Advisor: https://donorbox.org/network-advisor-expansion
————————————————————————
Please feel free to share this video with your friends and family if you found it useful.


